
Let’s be clear: an 8 GB VRAM GPU is not a powerhouse for modern AI workflows. It’s a size designed for mid-level gaming tasks, where textures, shadows, and postprocessing are prioritized — not gigantic neural network weights, attention layers, or diffusion pipelines.
In AI, memory is everything. You will very quickly hit CUDA out-of-memory (OOM) errors, and even when something does load, many models will throttle themselves (or crash) to fit into your limited VRAM. Very large, high-parameter models often refuse to run or run at extremely low quality, or in CPU fallback mode (which is excruciatingly slow).
So the narrative is: “Given such a constrained environment, what can you actually run locally? And how far can you push that?”
I’ve personally run a wide variety — text, image, speech, music, even occasional video — on my 8 GB setup. The results are often imperfect, slow, or constrained in length, but they are real. Below is a breakdown of what works (and what barely works) for me.
1. Text Generation (Chat / LLM)
Generating text typically requires far fewer floating point operations per token than image or audio. An 8B-parameter model, especially if quantized (4-bit, 8-bit) or run with GPU offloading, is often within reach — if you pick your model wisely.
Many people use a tool like Ollama to simplify running LLMs locally. Ollama abstracts away the complexities of environment setup, hosting, quantization, etc. You essentially run something like ollama run <model-name> to get a local chat endpoint. However, not all models behave sensibly. Sometimes they:
- Don’t follow instructions (are not “aligned”),
- Hallucinate a lot,
- Are too heavy for your GPU.
Hence my preference: Llama 3.1 (8B, instruction-tuned / “instruct” variant) — it hits a good balance between capability and resource usage.
I use it for chat, summarization, code generation, content ideas, etc. It’s not perfect (you’ll still get weird outputs sometimes), but in an 8 GB environment, it’s one of the more stable choices.

Why I like it
- Fast enough for local interactivity
- Respectable coherence and instruction following
2. Image Generation
Most people know Stable Diffusion as the go-to open source image generator. But it tends to require 10 + GB VRAM (for good resolutions, multiple diffusion steps, etc.). On 8 GB you will often either:
- Hit Out of Memory errors,
- Be forced to lower resolution or reduce steps,
- Or fall back to CPU mode (which is extremely slow).
There is a CPU fallback path (e.g. “fastSDcpu” or similar), but performance is glacial, and quality often suffers (blurry artifacts, patchiness, odd textures) — sometimes worse than amateurish. The ultimate solution is Fooocus!
Fooocus is an open source, offline image generation UI built on Stable Diffusion (XL and variants) that aims to simplify and optimize image generation even under constrained GPU memory.
Some of its advantages include:
- Minimal manual tinkering: the UI handles prompt refinement.
- Lower baseline memory requirements (they claim 4 GB GPU minimum)
- Optimizations like LCM (low-rank adaptation) or prompt expansion baked in (Wikipedia)
- Smooth UI experience (Gradio-based)
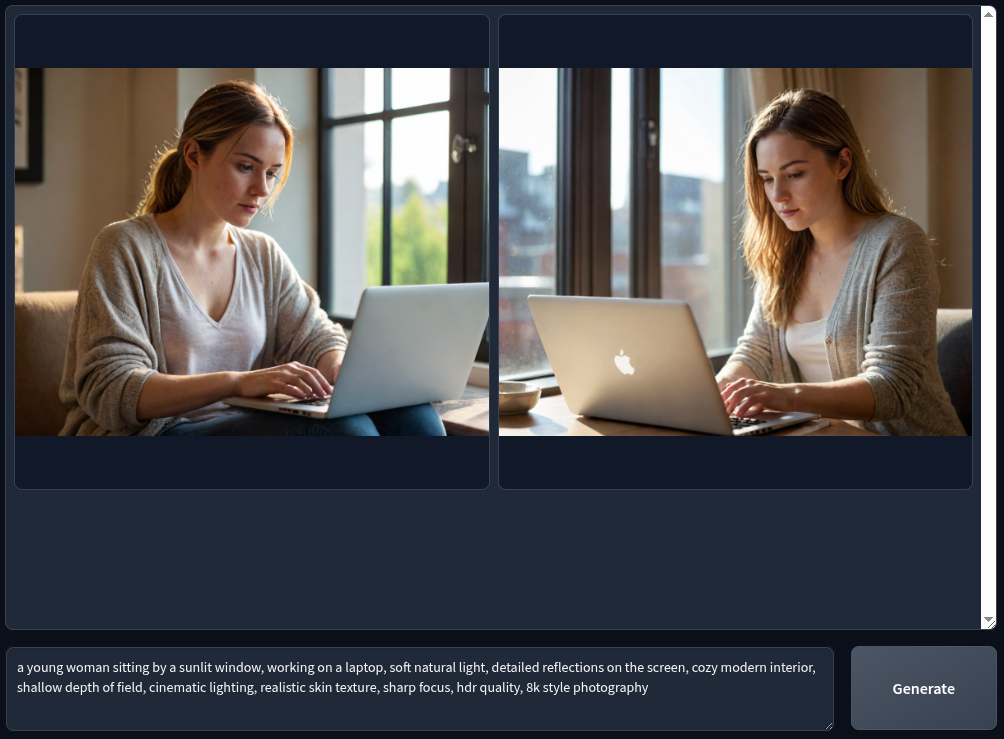
Using Fooocus, I generate decent images at higher resolution, with usable quality, in tolerable latency (on my machine). The tradeoff: fewer diffusion steps, more smoothing, and occasional artifacts. But it’s usable daily.
Here’s a sample of image I generated using Fooocus:
Prompt: a young woman sitting by a sunlit window, working on a laptop, soft natural light, detailed reflections on the screen, cozy modern interior, shallow depth of field, cinematic lighting, realistic skin texture, sharp focus, hdr quality, 8k style photography
3. Speech Generation
When it comes to generating speech locally, there are countless text-to-speech (TTS) options online — some are open, some paid, some half-finished — but the reality is that most of them either sound robotic, lack emotion, or have licensing restrictions that make them unsafe to use publicly.
At first, I experimented with a few open TTS engines like Piper, which works great on CPUs and gives decent results, but still has that unmistakable synthetic tone. Then I discovered something that completely changed my workflow — Kokoro-TTS.
Why I Love Kokoro-TTS
Kokoro-TTS is by far the most realistic and human-sounding open-source speech generator I’ve used locally. It’s light enough to run comfortably on an 8 GB laptop, doesn’t need expensive hardware acceleration, and yet produces output that can easily compete with some paid TTS platforms.
The voice clarity, natural pauses, and subtle tone shifts make it stand out. What’s more impressive is that Kokoro allows you to adjust the pause range — meaning you can fine-tune how long it stops at commas or full stops. This simple tweak makes a huge difference in how natural and expressive the speech feels.
It’s the small details like that which make Kokoro-TTS so special — it doesn’t just “read” your text; it performs it.
Realistic Voice for Free
Even though it’s open source, Kokoro-TTS once ranked as one of the top three best text-to-speech engines in TTS Arena Leaderboard, right before commercial products like ElevenLabs began to dominate the space. At the point of writing this post, it’s ranked number #8. The fact that a free, lightweight model could reach that level of realism says a lot about how well-engineered it is.
Unlike most local TTS systems that make you cringe after a few seconds, Kokoro’s output feels professional enough for narrations, YouTube videos, or any kind of content creation — all from an 8 GB laptop. When you listen back to the Kokoro-TTS output, you can hear the attention to rhythm, tone, and breathing patterns — things that most open TTS completely ignore.
This is the TTS engine I use for my projects, voiceovers, and narration work. It’s stable, efficient, and doesn’t sound like a robot pretending to be human — it actually sounds alive.
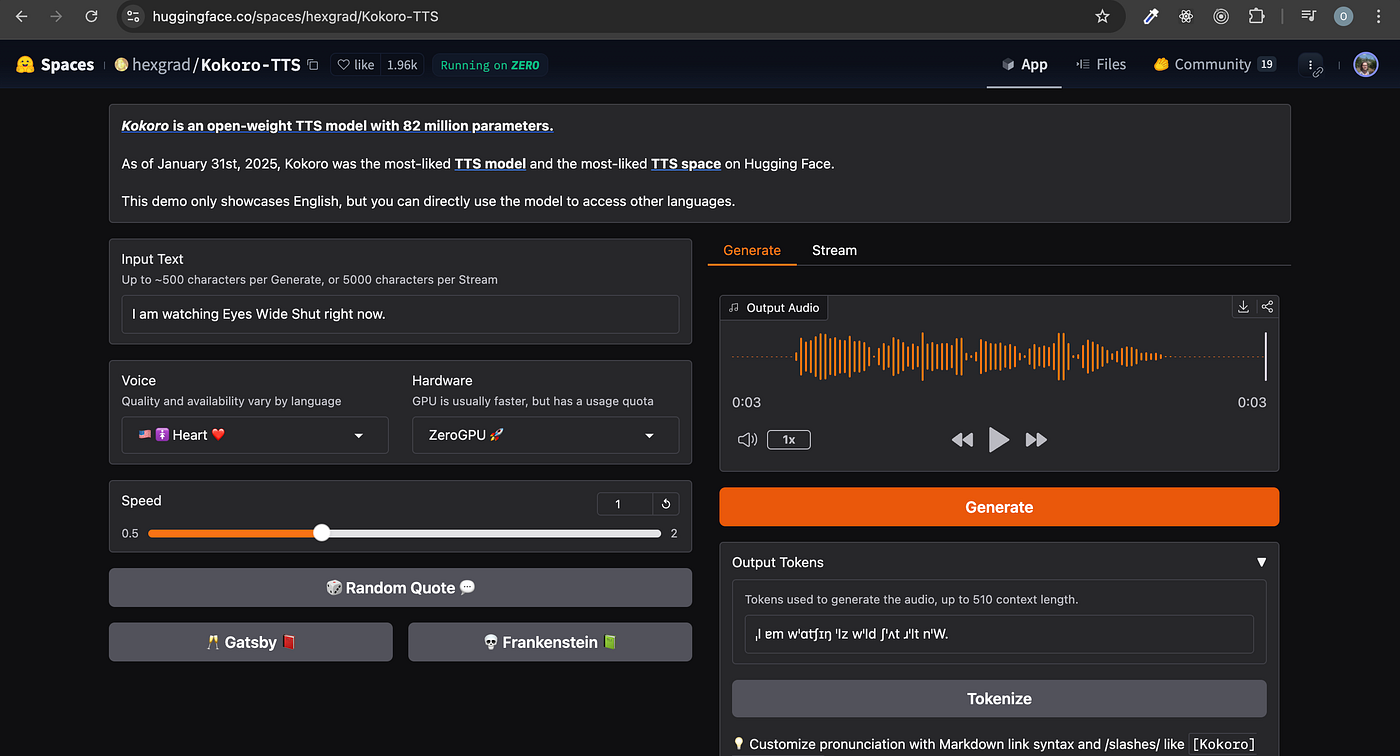
Here’s a sample of what I generated using Kokoro-TTS on my 8 GB VRAM laptop:
Text: This voice you’re hearing was generated on U C S code laptop with eight gigabytes of RAM. Most people think that’s too little to run AI smoothly… but with the right tools, it’s possible. From text, to images, to music — all created locally. And this voice? It’s powered by Kokoro-TTS — an open-source engine that sounds almost human. Not bad for a small laptop, right?
4. Instrument / Melody Generation
Generating musical instruments (melodies, harmonies, accompaniment) is more demanding than image (often) because you may need to model time series, temporal coherence, polyphony, longer contexts, etc. It’s common to hit memory limits quickly, especially when conditioning on prompts or long sequences. The dreaded “CUDA out-of-memory” is a frequent companion here.
Many music generation models are large, or expect server-grade GPUs. But for my workaround, I decided to consider MusicGen (from Audiocraft)
Meta / Facebook’s Audiocraft suite includes MusicGen, a model for music generation. The full model is heavy, but there is a small variant (“MusicGen-Small”) which is much more forgiving in memory usage. While it can’t generate very long or extremely complex compositions, it can produce usable instrumentals (short clips, loops, ambient beds) even under memory constraints. It’s not perfect — but on 8 GB, it’s one of the few that will always run.

Why AudioCraft / MusicGen
- It’s one of the better-known open models for instrument / music generation.
- The small variant is explicitly meant to reduce resource demand.
- There is community knowledge around tweaking it for low VRAM machines.
Here’s a sample of instrumental I generated using musicgen-small
5. Full Music / Song / Multi-track Generation
The “breaking point”
This is often where 8 GB hits a dead wall. Full song generation, vocals + instruments + mixing, or long form composition almost always triggers OOM or extremely slow CPU fallback. Many models in this domain expect 24 GB+ GPUs, or are hosted services (cloud only). But I have pushed it with Acestep.
Acestep is a more minimalistic music generation engine (or hybrid pipeline) that sacrifices complexity for memory efficiency. It may:
- Use smaller internal models
- Limit time horizon
- Use simpler synthesis rather than neural waveform generation
- Use conditional segments or concatenative techniques
In my experience, Acestep on 8 GB can generate brief musical pieces (a few bars or short loops) with acceptable quality (given the constraints). The key is managing expectations: don’t expect a 7-minute fully mastered track. But for ambient beds, backing loops, or experimentation, it’s fascinating that it works at all.
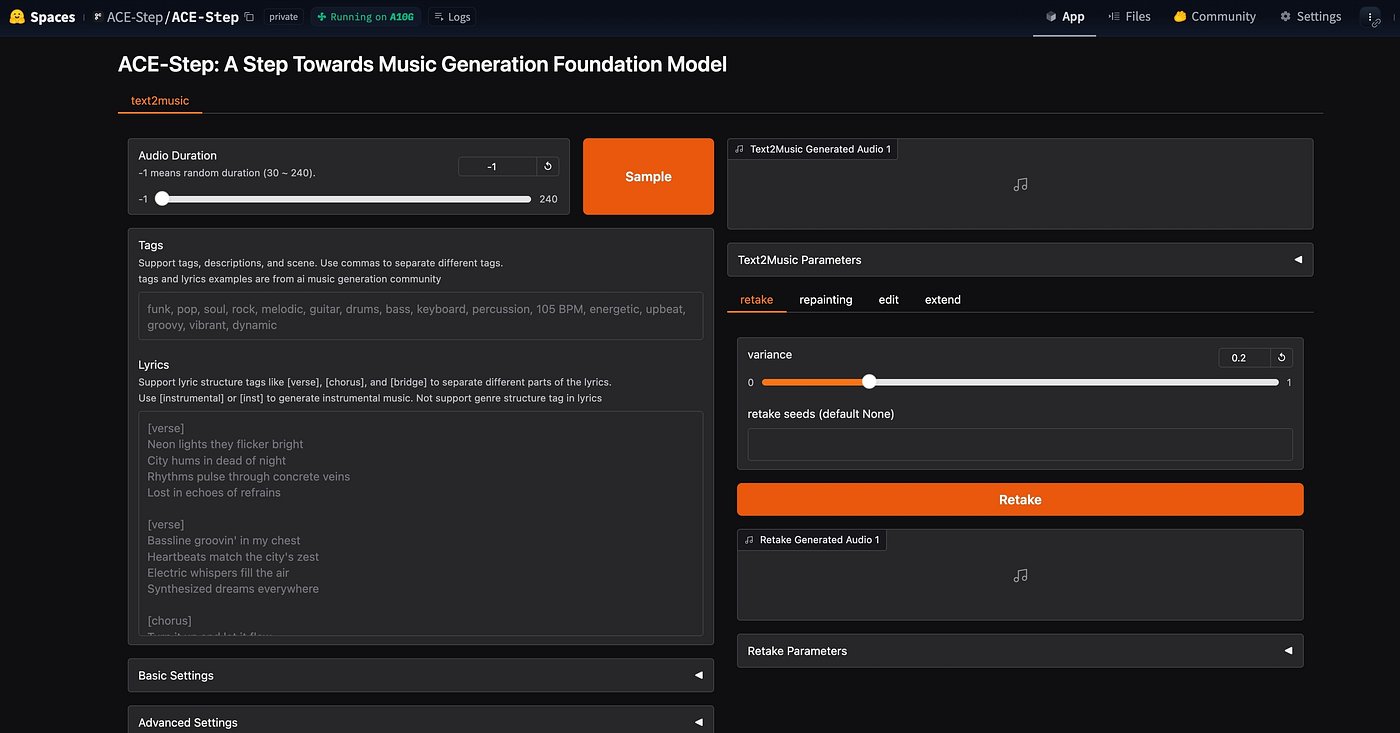
Here’s a sample of music I generated using Acestep:
6. Video Generation
“A moment of silence for all 8 GB laptop users”
Video is easily the heaviest. You may be synthesizing multiple frames, diffusion over time, temporal consistency — this compounds memory usage enormously. The path is fraught with crashes, extreme slowness, or fallback to absurdly low resolution or length.
Yet — in some cases, you can coax a video out of it, with ComfyUI being one tool I’ve used to create very short video loops (e.g. 5 seconds) on my 8 GB. However, you should expect:
- Extremely slow generation (minutes-per-frame or worse).
- Lower resolution (e.g. 256×256 or 512×512).
- Limited number of frames.
- Artifacts like flickering, frame collapse, jitter.
ComfyUI has modular pipelines and supports temporal nodes, latent-to-latent transitions, etc. It lets you piece together small video-generation workflows that can (just) run under constrained memory. Because it’s modular, you can disable heavy components and sacrifice complexity in order to make it fit.

ComfyUI is often described as the “engine room” of local AI image and video generation is very powerful, modular, and extremely customizable. But if you open it for the first time, it can feel like a spaceship’s control panel. The interface is built around nodes and wiring, and for newcomers, this visual complexity can be overwhelming. Every function is represented by a node that you must connect in the right sequence. It’s not plug-and-play like Fooocus; it requires understanding how each component interacts.
However, once you have an understanding how ComfyUI works, everything changes. The nodes and wires represent unlimited flexibility that allows you to build your own workflows, customize generation pipelines, and achieve results that no simplified interface can match. It’s one of those tools that demands patience upfront but rewards you endlessly once mastered. No kidding!
After getting comfortable with ComfyUI, the chances are, you might never return to any of the tools listed above except for the sake of simplicity or instancy. In ComfyUI, you can combine text, image, and video nodes in ways that push your 8GB GPU to its limits yet still deliver astonishing results.
I don’t use video generation often, I generally avoid making videos because it almost takes forever to generate even low quality 5 seconds video. However, the fact that I made it on my 8GB make ComfyUI a top notch: you can squeeze creative video experiments out of a modest GPU.
I’ll take sometime to recreate another for sample.
Conclusion & Tips
- Always start simple: low resolution, few steps, short durations, minimal conditioning.
- Quantize, offload, and fallback aggressively.
- Incrementally increase complexity only when VRAM allows.
- Expect artifacts and plan post-filtering (denoise, upscaling, editing).
- Use CPU fallback when necessary (but be prepared for long waits).
- Store smaller checkpoints / models (so you don’t waste storage).
- Be patient and experimental — some models crash sometimes; you save, retry, tweak parameters.

.webp?w=300&resize=300,300&ssl=1 "Human-like Free Text To Speech AI (Forget Elevenlabs)")


